Showing posts with label Chocolate Chips. Show all posts

Wednesday, September 4, 2019

There Is Nothing Chocolate Won't Cure - Chocolate Chip - Get Well

 
 Yogi here today with lots of chocolate... Give me some good quality chocolate and I'm in BLISS!!!

I'm using a sentiment stamp from Quietfire Design ("My Dark Side Is Chocolate" 3pce set).

And am using a few of Suzanne's electronic files available on Silhouette onLine store. Click images to purchase. 


https://www.silhouettedesignstore.com/designs/297708https://www.silhouettedesignstore.com/designs/63063https://www.silhouettedesignstore.com/designs/48227

 
Opened SCAL (Sure Cuts A Lot software) and opened all 3 files, removing things I didn't need including the "a Cake" from the quote. Hid the chocolate chips and the Get Well and printed out the "There Is Nothing..." on white cardstock. Hid the quote I just printed and cut the rest.
 
Top folded my cream cardstock to create my card. Adhered a piece of Co'Ordinations brown cardstock edge to edge on the card front.

Applied ink using a WOW embossing pen and embossing with Emerald Creek "Oil Rubbed Bronze" embossing powder. Trimmed down, sponged some Distress brown around the edges and adhered to card front.

Colored the chocolates using Tombow markers in various shades of brown, leaving the shine piece white. Applied Versamark and clear embossed the whole chocolate. Adhered 3 of them to the card front.

On the inside: Colored the "Get Well" with a Tombow marker and inked with the Versamark and embossed with the bronze. Adhered to inside.

Adhered the remaining chocolate chips.


Wednesday, April 18, 2018

Chalkline Font - Coffee & Chocolate Chip - Life Doesn't Have To Be...


Yogi here today and I've been itching to do a coffee card...

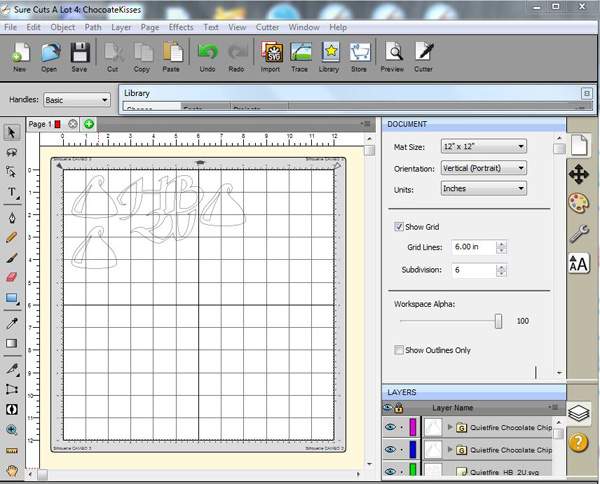
I'm using one of Suzanne's fonts that work great in emails, Word, Excel etc., it's an OTF font extension and available from Suznne at Quietfire Design. I used it in my SCAL (Sure Cuts A Lot) software and printed out the background and other text. Love that font, it's so funky...

I'm using one of the NEWEST quote stamps from Quietfire Design "Life Doesn't Have To Be Perfect...");

Also using a couple electronic cut files from Suzanne available on Silhouette. Click image to purchase. 

https://www.silhouettedesignstore.com/view-shape/247852 https://www.silhouettedesignstore.com/view-shape/48227http://www.quietfiredesign.ca/Chalkline-Funk-Font.html

Opened my projects in my SCAL software, removing portions not needed... Cut everything from white cardstock. Colored with Distress dabber "Walnut Stain" for the main coffee cup. Ran the cup holder piece through my machine with the Elizabeth Craft Designs "Coffee Bean" embossing folder. Sponged all over with the antique linen and hit the high points direct to paper with the walnut stain. Adhered to cup. The steam was inked with Picket Fence pad and embossed with Emerald Creek "Soft Fallen Snow" (love the texture...)
click on either SCAL image to enlarge

On page 2 of my SCAL software, I created my background using the Chalkline font and a bunch of coffee related words in various sizes. Resized the lot to fit my card base. Printed out on white cardstock. Colored the letters with Prisma colored pencils in various brown shades, then went over the whole page with a Distress "Antique Linen" pad (PS mine is a bit dry, I'm lazy and don't fill them very often... But I get nice tonal values this way BIG GRIN)
Scored and folded my dark brown textured cardstock (DCWV pad) to create the easel. Adhered another piece same size as card. Then adhered my text background and the coffee cup. Added the "Friends Cafe" on the cup.


On the floor: Colored the chocolate chip with Prisma colored pencils in various shades of brown. Scored it about mid way and adhered the bottom section to the floor to act as my stopper.

Stamped the quote using Versafine Black Onyx and clear embossed. Die cut with Elizabeth Craft Designs "Stitched Ovals" die set. Sponged around the edges with a dirty brown sponge and then with the antique linen all over. Removed from die and adhered to floor.

Trimmed down and adhered the sentiment.


Wednesday, August 2, 2017

Chocolate Kisses - HB2U - YUM


Yogi here today with a yummy card... you can never have too much chocolate!!!

I'm using a couple of digital files from Suzanne available on the Silhouette onLine store - click on an image to purchase.


I'm also using a sentiment and a coupe Fill 'er Up letter stamps from Quietfire Design ("Graphic Love Bits - Flowers or Chocolate..." 6pce set); ("JOY Fill 'er up"); ("MUm fill 'er Up" 2pce set);

Check out all the fabulous ribbons on Quietfire Design. I'm using "Ribbon Satin dotted Burgundy


Opened the 2 files in SCAL, increassed the sizes for my card size of 7"w x 5"h. Copied and pasted the kisses to get 3 of them, cut from white cardstock. Colored the chocolate and the HB2U with Distress acrylic dabbers. Dried. For the kisses, only the dark brown section, I inked with Versamark and clear embossed. For the HB2U, I ran thru my embossing machine with Cuttlebug "Swiss Dots" embossing folder, then hit the high points with a dark brown pad, then with Versamark and clear embossed.

Scored and folded my pink toned cardstock to create the easel (7"w x 5"h), then cut another piece the same size and adhered to front. Used my Misti to stamp the letters "YUM" inking with Versafine Sepia and then hitting here and there with Black Soot. Clear embossed. I had a brand new pack of Ecoline watercolor markers on my desk, so colored the letters with them. Adhered the kisses to the front.

On the floor: Cut a 3/4" wide piece of the pink cardstock the width of the card. Scored down the center and adhered to floor to act as my stopper. Also adhered part of the HB2U to this piece and the bottom section to the floor.

Stamped the sentiment with the black and clear embossed. Colored the flower with the Ecoline markers.

Added the dotted burgundy ribbon as a frame border and tied a small bow.

Thought that left bottom area was a bit sparse, so added the ladybug (Elizabeth Craft Designs) that was sitting on my desk.


Click on any card image to enlarge. Enjoy